Lab 02 : Flowgorithm and More GitHub
Before You Begin
Before starting the lab, make sure your workspace is set up correctly.
- Open VS Code.
- From the top menu, click
File→Open Folder...and open your own cloned folder. If you have not cloned it yet, follow Lab 01 first. - Make sure it is your own folder, not a classmate's. Many students share the same PC, so there may be more than one cloned repository on this computer. Confirm the folder belongs to you before doing anything.
REMINDER
Always verify the folder is yours before you start. Working in a classmate's folder means your work goes to the wrong repository, and you may overwrite someone else's work.
Next, make sure you are the one logged in to GitHub on this machine. Because the same PC is shared, a classmate may still be logged in from an earlier session.
- Open a terminal in VS Code by clicking
Terminalin the top menu bar, thenNew Terminal. - Check who is currently logged in:
gh auth status- If the account shown is not yours, log out first,
gh auth logoutthen log in as yourself:
gh auth loginIf no one is logged in, just run gh auth login and follow the prompts to authenticate. Refer back to Lab 01 if you need a reminder of the steps.
Once your folder and login are confirmed to be yours, continue with the lab below.
Pull and Update in VS Code
This lab will explain how to use Flowgorithm and how to integrate Flowgorithm with GitHub
Before starting any lab, you need to make sure that the repo in your GitHub is the latest one.
Sync the repo if the upstream repo have been updated.
REMINDER
Please sync the repo, you can refer to the link above on how to do it. I will know if you didnt do it.
Syncing the repo only updates the online repo that exist in GitHub web server. Back in our VS Code, the code are unchanged from the last time you used it.
Once the online repo is in-sync, bring those changes down to your PC by clicking Source Control and then ... beside Changes and click Pull.
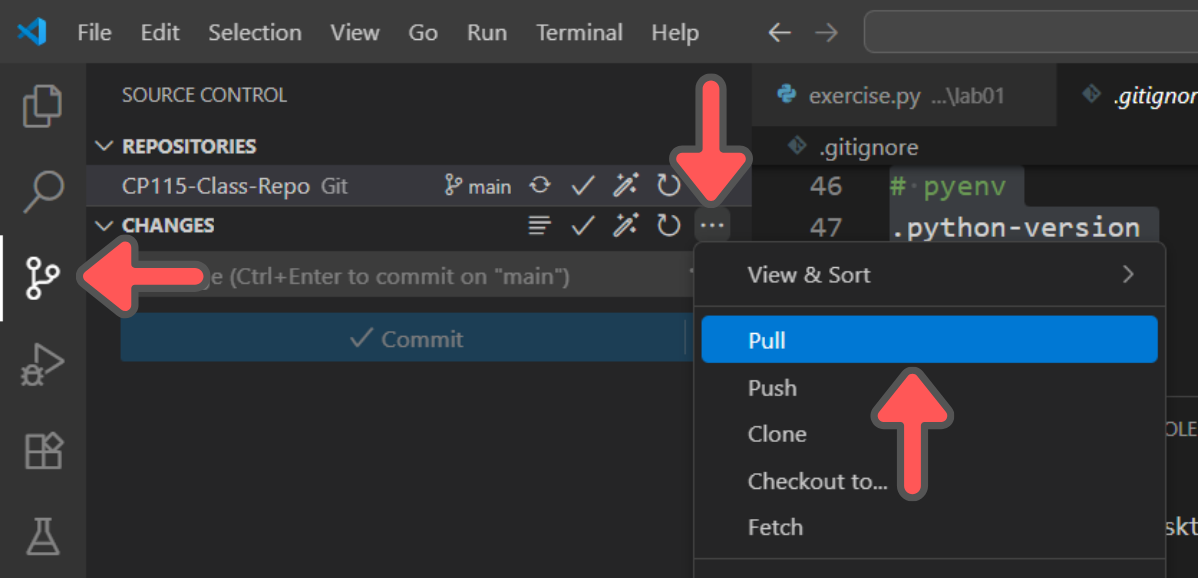
Pull connects to the project on GitHub, grabs any commits added since your last Pull, and blends those changes into your PC so your local files and history now match what's online on GitHub server.
Checklist Before You Proceed
- You have logged in to your Github account in the browser.
- You have logged in to your Github account in the terminal using VS Code.
- You have sync the repo in you Github account in the browser.
- You have pull the update into you repo in VS Code.
Introduction to Flowgorithm
Flowgorithm is a program that lets you draw an algorithm as a flowchart and then watch it run step-by-step. Each shape (start, input, decision, loop, etc.) represents one action in your logic, so you can see what happens to your variables without writing any code first. When you're ready, Flowgorithm can even show the matching Python code so you can relate the picture to real code.
Launch Flowgorithm by pressing ⊞ Win on your keyboard and type Flowgorithm. If you can't see it make sure you have installed it.
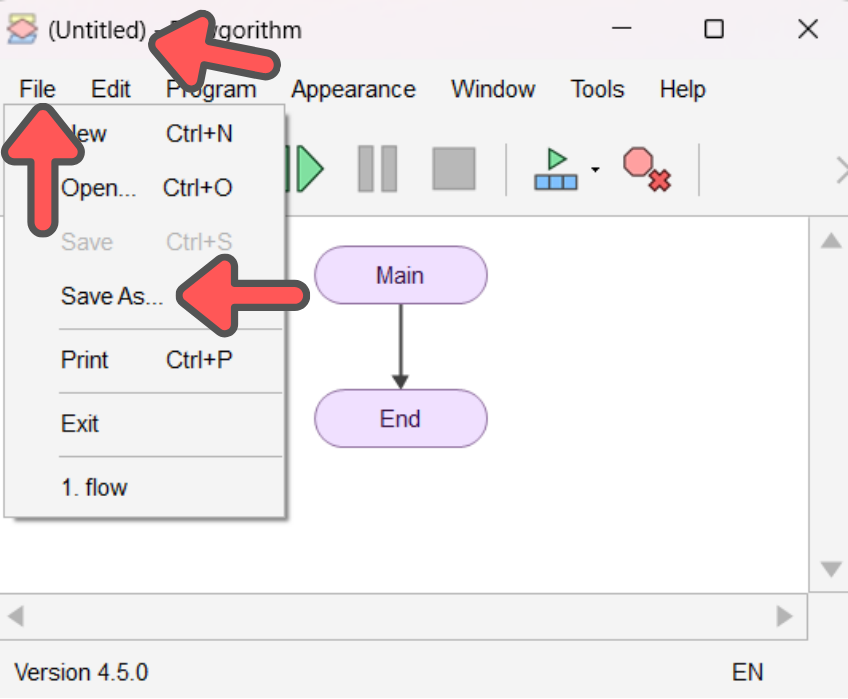
When you first launch it, you will see a simple flowchart, containing only Start and End. This is the default template of the any Flowgorithm projects. Before we edit the file, we need to save the file first.
To know if the file is still unsaved, the name of the file is still callled (Untitled). To save the file, click File and then Save As.... The system will prompt you on the location of the file you want it saved. Save it to any location you are comfortable with. Remember this location, you will need to use this later. Name the file exactly as this; lab-2.
Creating Our First Flowchart
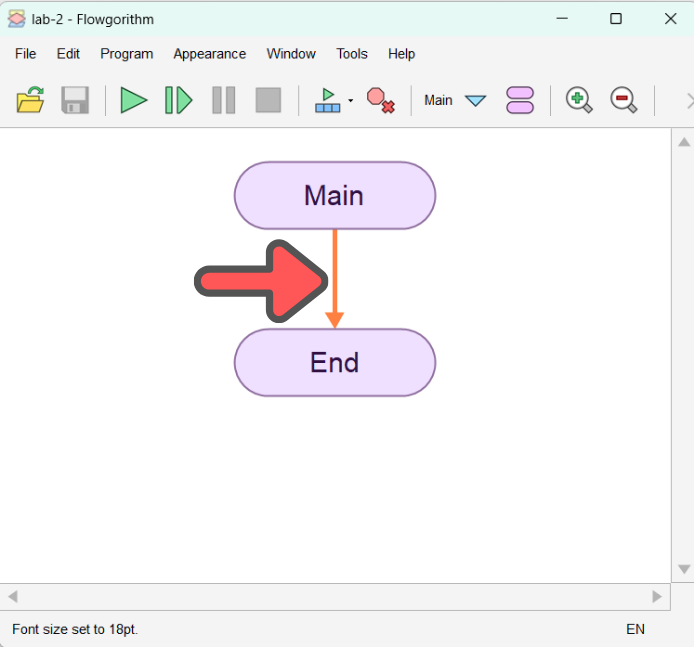
Hover your mouse on the arrow that is connecting Main and End until the arrow turns orange, then left click on the arrow.
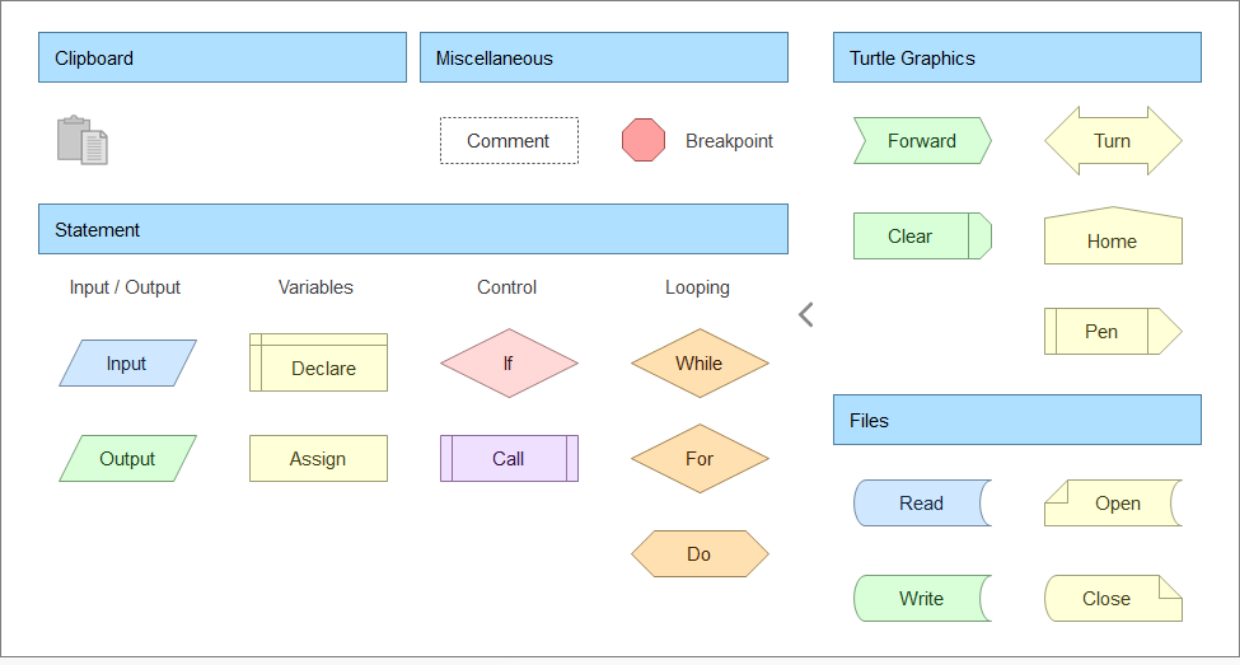
After you right click on in, you will see a window popup, listing all the shapes that you can add into your flowchart. Don't worry about the types of shapes that you see here, you will be taught on how to use it later.
Lets try to apply it on a scenario. For this example, lets use Scenario 1 from our Chapter 2 - Tutorial 1.
For this exercise, we are focusing on how to use Flowgorithm not how to create a correct flowchart. The usage of the shapes might be not the most accurate way, but take it easy. This exercise is emphasizing on the software.
Lets recall Scenario 1 from Chapter 2 - Tutorial 1 :
A government tax of 10% and service tax of 5% will be added to the price of a set of meal bought at MFC. Calculate the total price that Ali has to pay for a set of meal. Write a problem analysis for the given problem statement.
Creating Input and Output
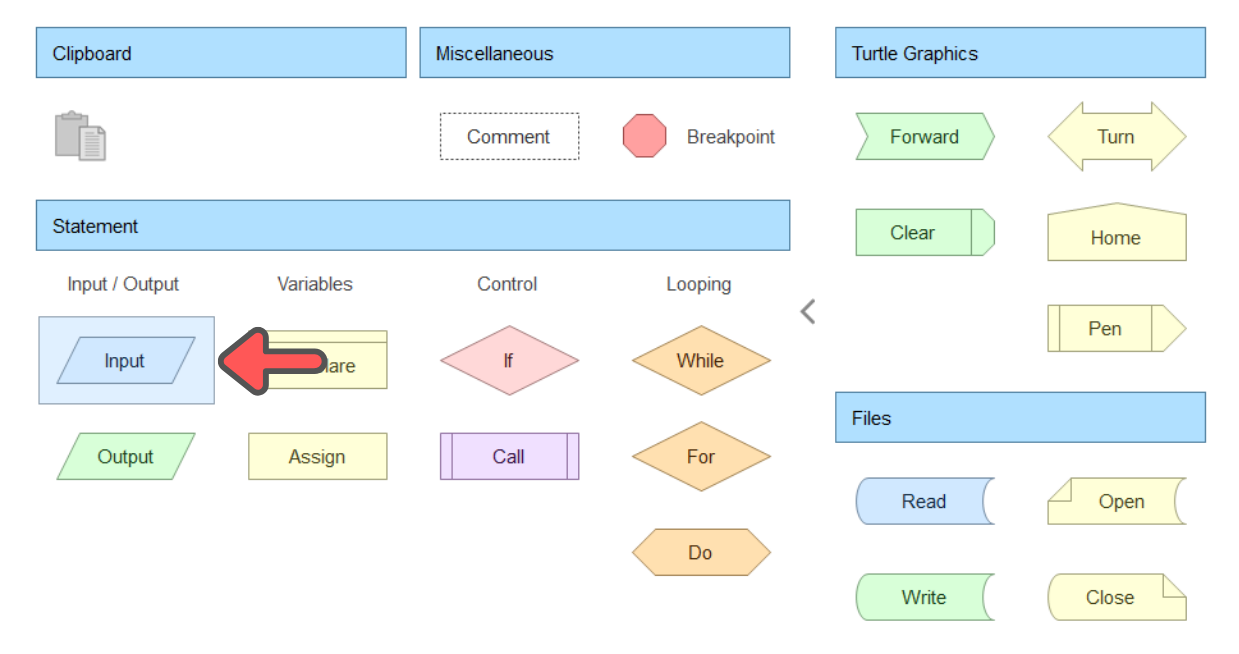
Click again the arrow between Main and End and open the popup window again. Under the Statement category, click the Input shapes.
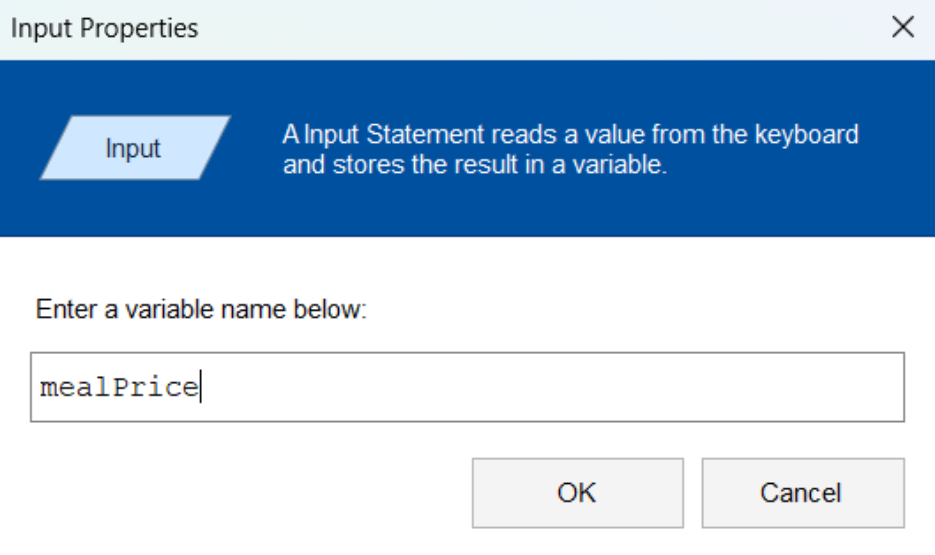
An Input shape will appear in between Main and End. So if you want to add a new shape in between the two old shape, click the line in between those two shapes. Now lets change the input in the Input shapes. Double click the Input shapes until a window appear that ask you to enter the variable name. For this questions, the input name is mealPrice.
NOTE
Any variable name that are used must only contains only letters and numbers, you cannot use special character such as - or _
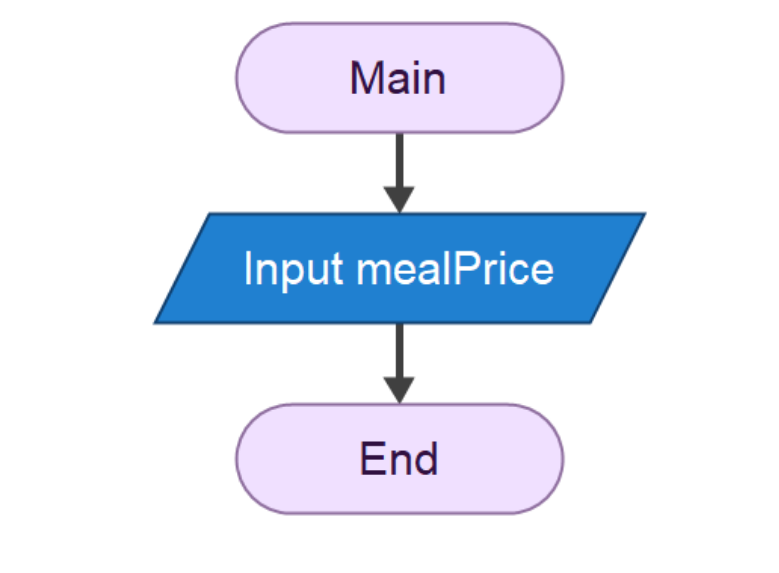
After finshing those step, this is what you should see as belows.
Now repeat the process again, but this time, use the Output shape and enter the variable name for the output. Make sure that you click the arrow between Input and End so you will add the Output shape in the correct sequence.
Declaring the Variable
Even though we have declared our input and output, in Flowgorithm, we need to separately declare our variable first outside the Input and Output shape. So for your Input, click the arrow between Main and Input so we can declare the variable used in Input shape.
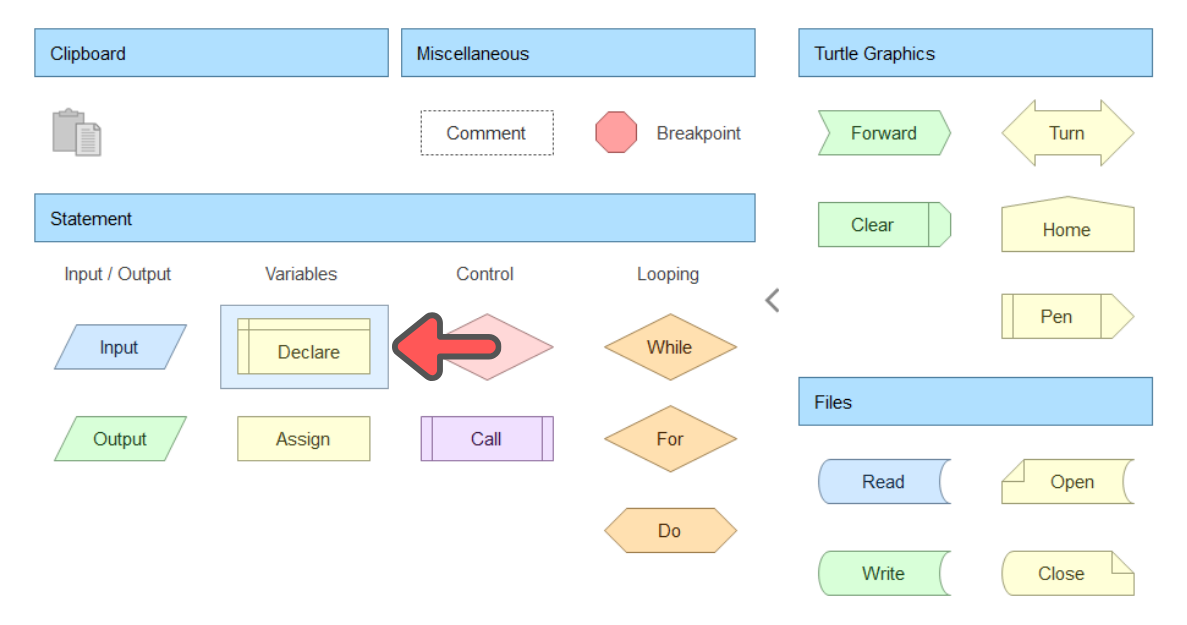
In the popup window, under the category Statement, choose the Declare shape.
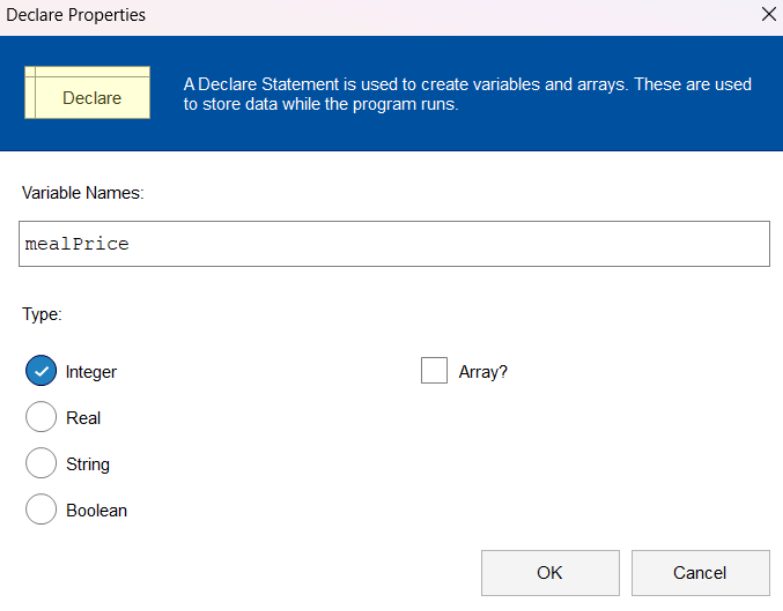
Double click the Declare shape and name the variable exactly as you put in the input, which in our case, is mealPrice and choose the Integer data type. Click OK to finalise it.
The result afterwards should looks like the below
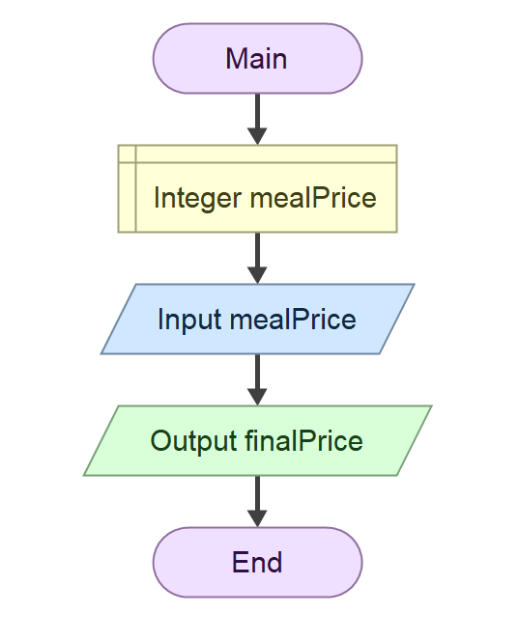
Repeat the steps again to declare the variable that are used in Output shape. After you finished that, click anywhere in the Flowgorithm and press Ctrl + S to save the file.
REMINDER
Make sure you click the correct arrow to ensure that the variable is declared in the correct sequence.
Using GitHub Actions
GitHub Actions is a built-in tool inside GitHub that can automatically run tasks for you, like checking your code, testing it, or uploading your project to a website.
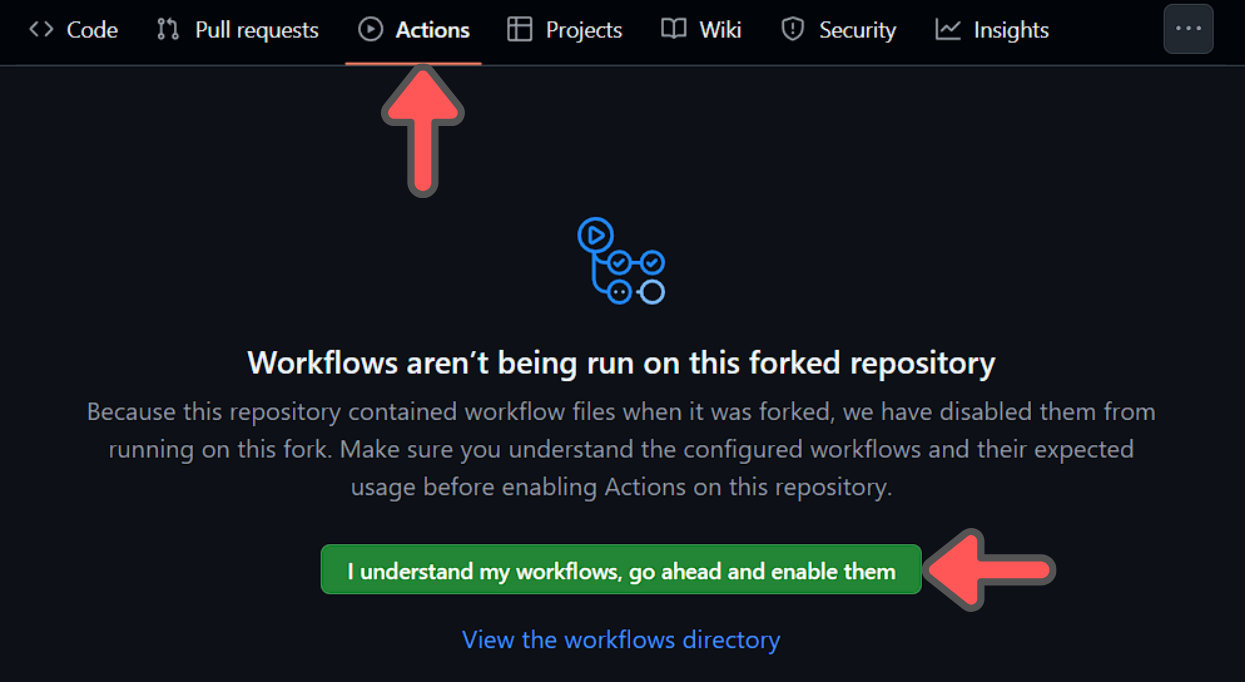
To set up your GitHub Actions, go to the cp115-class-repo in your GitHub account and go to the Actions tab.
Click the I understand my workflows, go ahead and enable them.
REMINDER
Please check that you are currently opening your repo, not mine (Yes,this is me, you lecturer, talking to you directly.)
Using Flowgorithm with GitHub Action
Copy and paste the saved file from the Flowgorithm section earlier into /labs/lab02/ directory of your repo using VS Code.
REMINDER
Copy and paste properly, dont skip this one.
Then commit and push the code. Refer back to the previous lab on how to do commit and push if you don't remember how to.
When you push your changes to GitHub, a special process called a GitHub Actions workflow automatically runs in the background. Think of this as GitHub testing your work — just like an auto-checker.
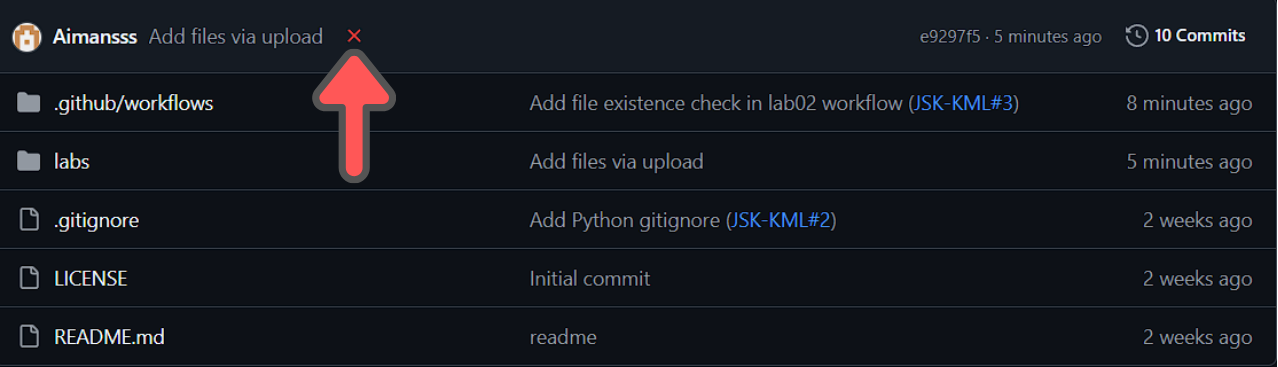
After you push, go back to your repository on GitHub. You'll notice a small orange circle beside your latest commit message
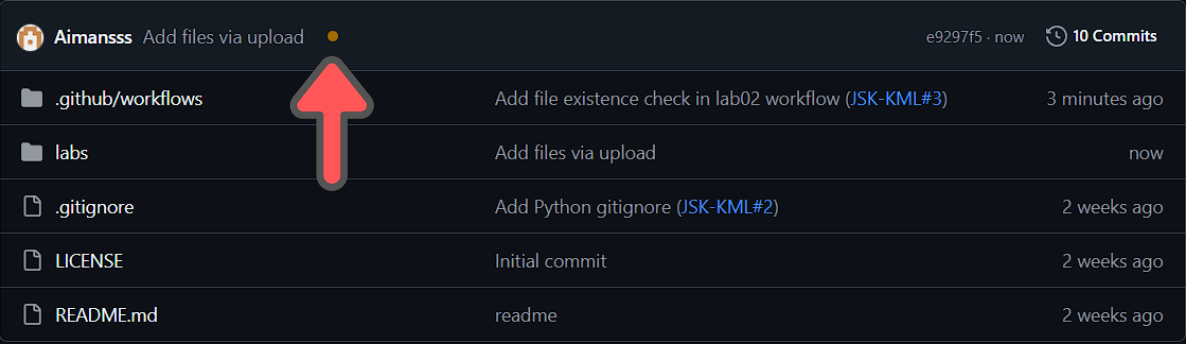
If there’s a mistake, the orange circle will change into a red cross. This means your submission didn’t pass the automated check, but don’t panic, you can fix it.
Click the Actions tab and click the latest workflow inside the Actions.
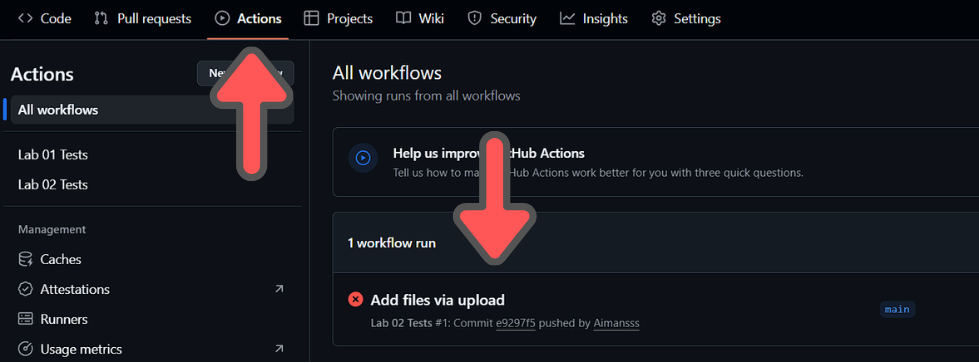
Inside the workflow, you’ll see a clear error message showing why it failed. This might say the file is missing, wrongly named, or contains something invalid.
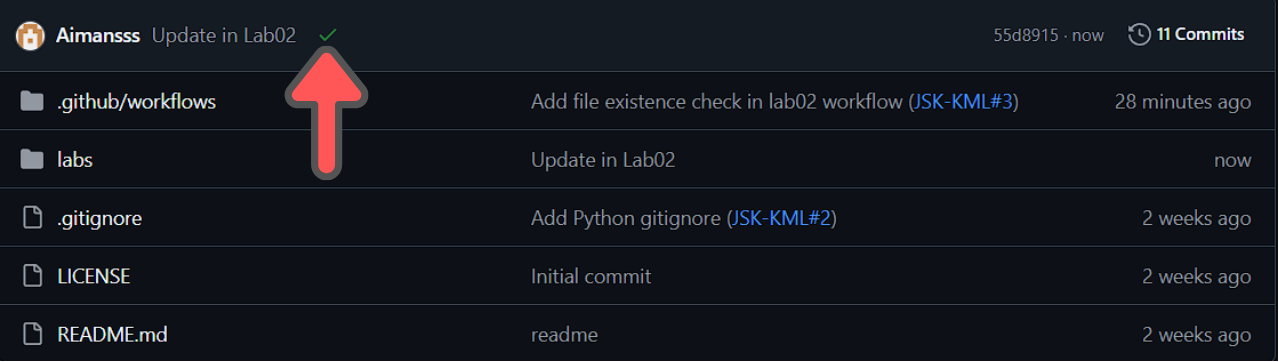
Successful Action Workflow Task
Your task is to read the error message and correct the mistake based on the error. If the workflow is successfull, you should see a green tick next to your commit message.
Exercises Task
Now that you know how to build a flowchart in Flowgorithm and push it for the auto-checker to verify, it is your turn to practice. Below are five problems. For each one, build a flowchart in Flowgorithm using the sequence structure and save it with the exact file name given.
REMINDER
Save each file with the exact file name stated in the question and place it inside the /labs/lab02/ directory. The GitHub Actions auto-checker looks for these exact names. A wrong name (for example exercise1.fprg instead of exercise-1.fprg) will fail the check.
Exercise 1 - Money Changer
A money changer charges a 2% commission on the amount of Ringgit handed over. The commission is deducted first, and only the remaining Ringgit is converted to Thai Baht at the day's exchange rate. Calculate the amount of Baht received.
Save your file as exercise-1.fprg inside the /labs/lab02/ directory.
Exercise 2 - Timber Shop
A timber shop sells planks of wood priced per metre. A customer states the length of timber they need in centimetres. To allow for cutting mistakes, the customer always buys 10% extra timber. Calculate the total length the customer must order in metres, and the total price.
Save your file as exercise-2.fprg inside the /labs/lab02/ directory.
Exercise 3 - Air-Conditioner Running Cost
Pak Long has been complaining about his electricity bill. His old air-conditioner draws a certain amount of power in watts, and he leaves it running for a number of hours every night. Electricity is charged at RM0.218 per kilowatt-hour. Pak Long wants to know how much that one air-conditioner costs him to run each night, and across a whole month of 30 days.
Save your file as exercise-3.fprg inside the /labs/lab02/ directory.
Exercise 4 - Roadtrip
Syafiq is planning a roadtrip. His car uses 8 litres of petrol for every 100km travelled, and petrol costs RM2.05 per litre. Given the distance of his journey in kilometres, calculate how much he will spend on petrol.
Save your file as exercise-4.fprg inside the /labs/lab02/ directory.
Exercise 5 - Photo Printing
A phone shop charges customers to print photos. There is a fixed service fee of RM2 per order, plus RM0.50 for each photo printed. Given the number of photos a customer wants printed, calculate the total cost of their order.
Save your file as exercise-5.fprg inside the /labs/lab02/ directory.
Finishing Up
Once all five exercise files are saved inside /labs/lab02/, submit your work and log out of the shared machine.
- Commit and push all your files to GitHub. Refer back to commit and push if you need a reminder.
- Confirm your push succeeded by checking the green tick in the
Actionstab of your repository on GitHub. - Log out of GitHub on this machine so the next student does not push to your account:
gh auth logoutREMINDER
Always run gh auth logout before you leave. If you stay logged in, the next student using this PC could accidentally push their work to your repository.